Friday 28 June 2013

Pure brilliant white

For now.
Thats all the interior and any parts that will be inaccessible when the deck and cockpit go in
topcoated. I guess any places that I don't want getting dirty will be the places I can get
at to touch up after anyway. The deck sheeting is ordered and will be ready early next week.
The last of the disused rivet holes have been plugged so all I can do with the hull is wait for the
putty to dry. I'm going to concentrate on masts for the next week and hopefully the following
week will see the deck go on and the engine arrive.

Getting pretty again


Tuesday 25 June 2013

Puttying finished

So thats all the ribs, all the fastenings, all the caulking and all the puttying finished. She is
now a boat that might float. Please let it float.
I also mixed up some concrete as well and packed it down either side of the deadwood.
Thats what she had there before so I did the same. I've been avoiding any woodwork over
it because its impossible to clean out anything that falls down there.

Absolutely loving it


Saturday 22 June 2013

Finished caulking

Finished off the caulking today, all except the very top of the transom which will have
to wait until the tent is gone. I didn't have time to finish the putty so that can wait until
the next day.
The inside is now all undercoated in white ready for top coat.


Wednesday 19 June 2013

Rivets

Today was the first day I got down to Teal this week but the rivets arrived yesterday
so Ken came along and we riveted the last four ribs and about 50 other rivets that
were needed elsewhere. I calculated that Teal has around 2200 fastenings in total and
we have replaced 1600 of them.
We also gave one side inside a coat of white undercoat.
Next I can finish the caulking and puttying.
I've ordered the glue for the mast and the T&G sheeting for the deck as well.


Saturday 15 June 2013

More bits


Planed off the window blanks, sealed the join with a little epoxy. Just needs a light sanding and I think the varnish will disguise it pretty well. I also need to route out a rebate for the glass and then fit the bronze bessel.


Painted the rest of the ribs and put in some temporary floor boards for climbing in and out. Less tripping over stuff


It took more than a coat of paint.


Deck beams all primed and the front two varnished. I'm looking forward to lying in the forepeak berth with a lamp lit looking up at the old varnished oak against the new white painted deck boards.

Friday 14 June 2013

Primed inside


Trying to make a round window fit in a larger square hole, I had to put in a backing piece to make it a good strong repair. I will plain it and sand it flush the next day and cut out the other half of the circle for the new deadlight. I've hated those rectangle deadlights since the day we bought her so I'm glad they are gone.


Sole board bearers, The two in the foreground are higher than the rest. They are beneath the companion way so when you stand there your head is just about out the hatch, They also make the floor wide enough for the companionway steps to sit on and the will also house the electric bilge pumps.


I sanded out the rest of the interior today and finished grey priming it all so its all nice and uniform and ready for undercoat. I'm going to use Danboline bilge paint on the bilge. I know theres mixed feelings on painting bilges in wooden boats as opposed to oiling them but her bilge will be shallow so I'm just going to opt for sealing it with paint


Andy Rankins mizzen mast step, Perfectly good and ready to be bolted in.


Lodging knees ready to be bolted in


Ribs steamed in ready for riveting, Rivets are on the way so should be pressing on with that in the middle of next week which means I can finish the last bit of caulking and putty.


Some of the deck beams are primed, will be finishing them very shortly along with the rest of the ribs.

Monday 10 June 2013

Finished with ribs

The dry weather has come to an end so I was able to go ahead and steam the last few ribs
in. I soaked the Oak for a few days first as it was seasoned oak and then boiled them in water
in the steam pipe for two hours before bending them in. They actually bent easier than the
green oak ones we put in before but that could be down to the fact I used a gas torch to
heat the pipe this time and it was easy to keep it regulated.
That is the first three went in easily, the last one nearly killed me. I could have called for help
but the first three had led me on. The last one had only been steamed for an hour and a bit and
it took me awhile to get the bottom of it wedged down beside the stern knee by which time it
had cooled and I should have given up.
I didn't, and it wasn't showing any signs of cracking so I kept going and got it eventually. I
literally had steam coming out of my wellingtons when I took them off after. It wasn't pretty.
I also got the lodging knees ready to fit and the sole board bearers made and fitted over the last
few days. So now I just need rivets and I can get the last seams caulked and puttied.
My camera battery died just as I went to take pics so heres some of Glandore instead.
Teal will be kept in Union Hall across the harbour.


Glandore bay

Union Hall from Glandore side

Adam & Eve Islands at the harbour mouth


Wednesday 5 June 2013

Its all coming together

I've been busy puttying with the last few days. I've gone as far as I can now until I get the
ribs and rivets sorted. She has swallowed up 12kgs of putty so far and will probably need
another 3 by the time I'm finished. Its a bit tiring on the hands but a reasonably pleasant job.
I got hold of some Oak for the rest of the ribs today as well so I have just finished preparing
that.
It is seasoned timber and will be hard to bend so I have put them inside of some gutter pipes
(that thankfully I've been too lazy to put on the house) for a few days to soak before I steam
them. I will probably break some but I'll get there eventually.
I really have the end in sight now, unfortunately I think money will be the only reason to miss
Glandore. If I could afford the decking and the rivets I could start on that next week while I
wait for the putty to dry but as it happens I can not.
I could order the rivets tomorrow but I am going to do the sensible thing and get the glue for
the mast this week instead.
I have a various other jobs I can get on with while I'm broke anyway such as new backing
blocks for the chain plates and beaching legs, concrete for around the deadwoods, sole board
bearers and refit the mizen mast step and rudder skeg, the list goes on !!
Although I probably won't make Glandore I think it will only be because she has to go to sea
to get there and I won't risk her out if I don't think shes ready, I do however have every intention
of getting her afloat in early July so I am going to keep the pressure on.


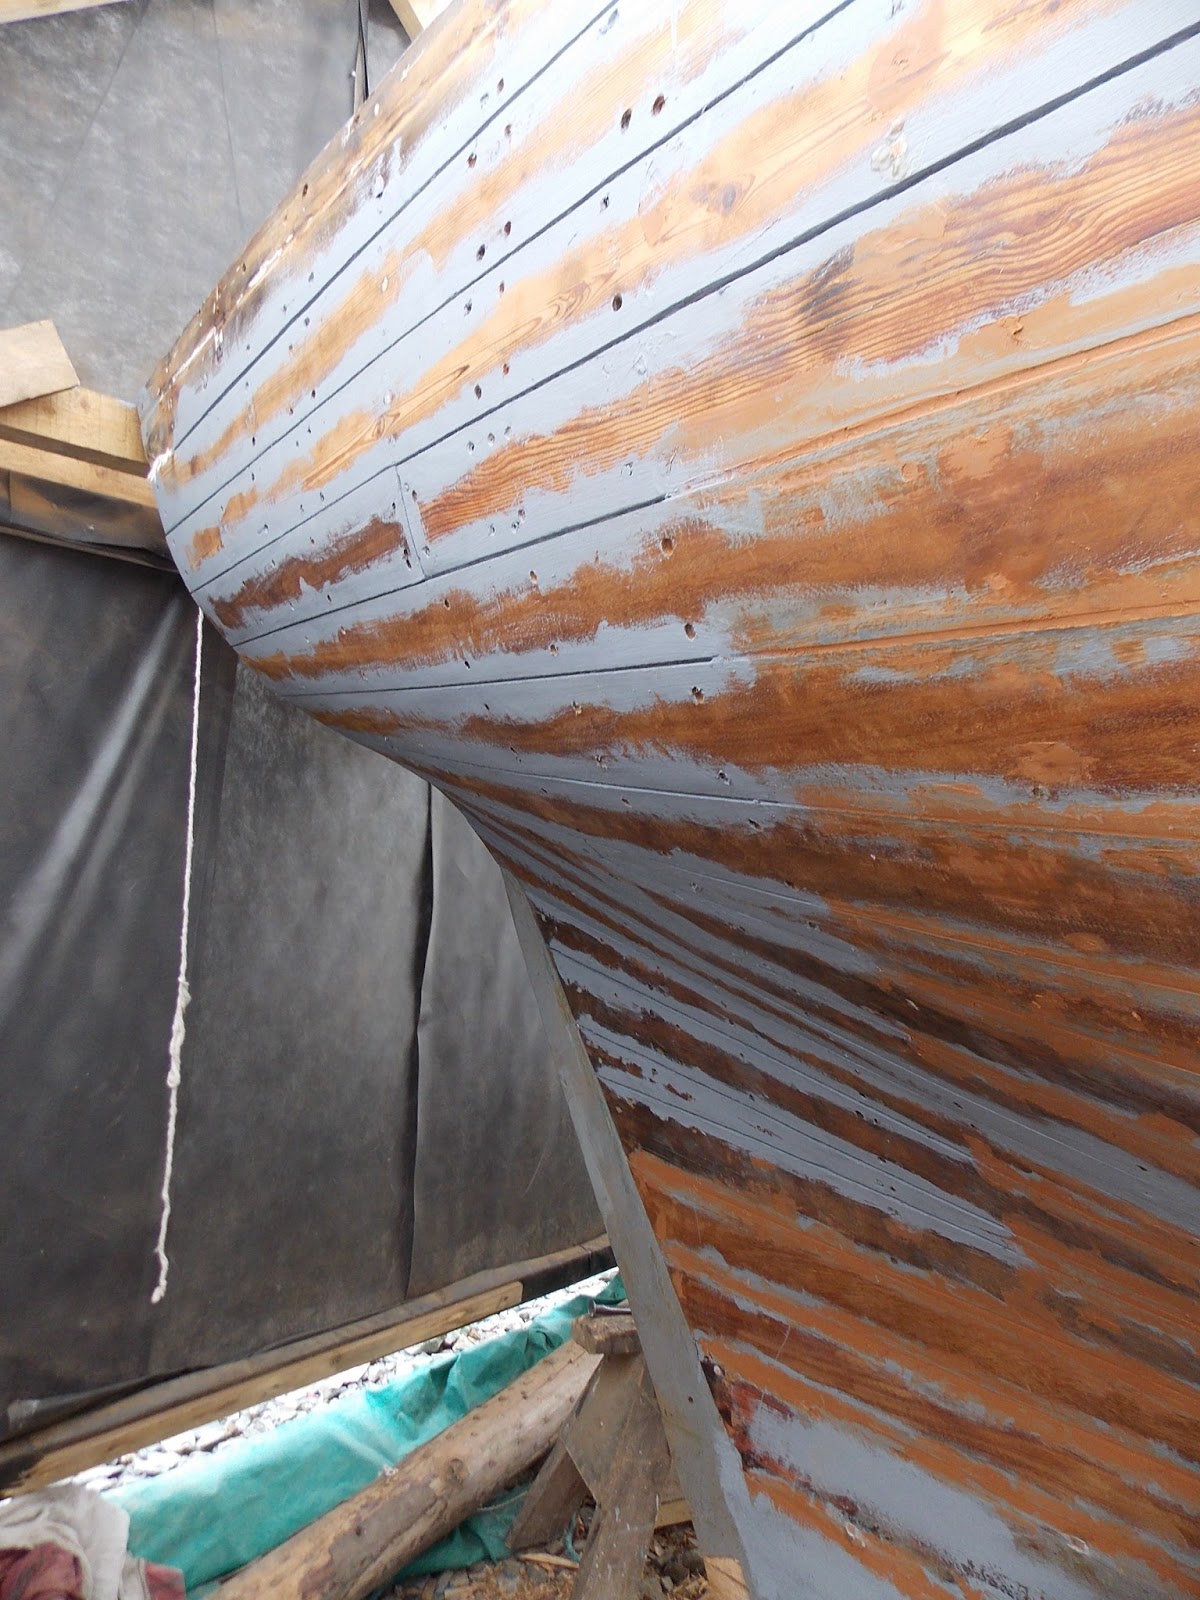
The corner that pains me, I have to take 5 steps backwards to finish it


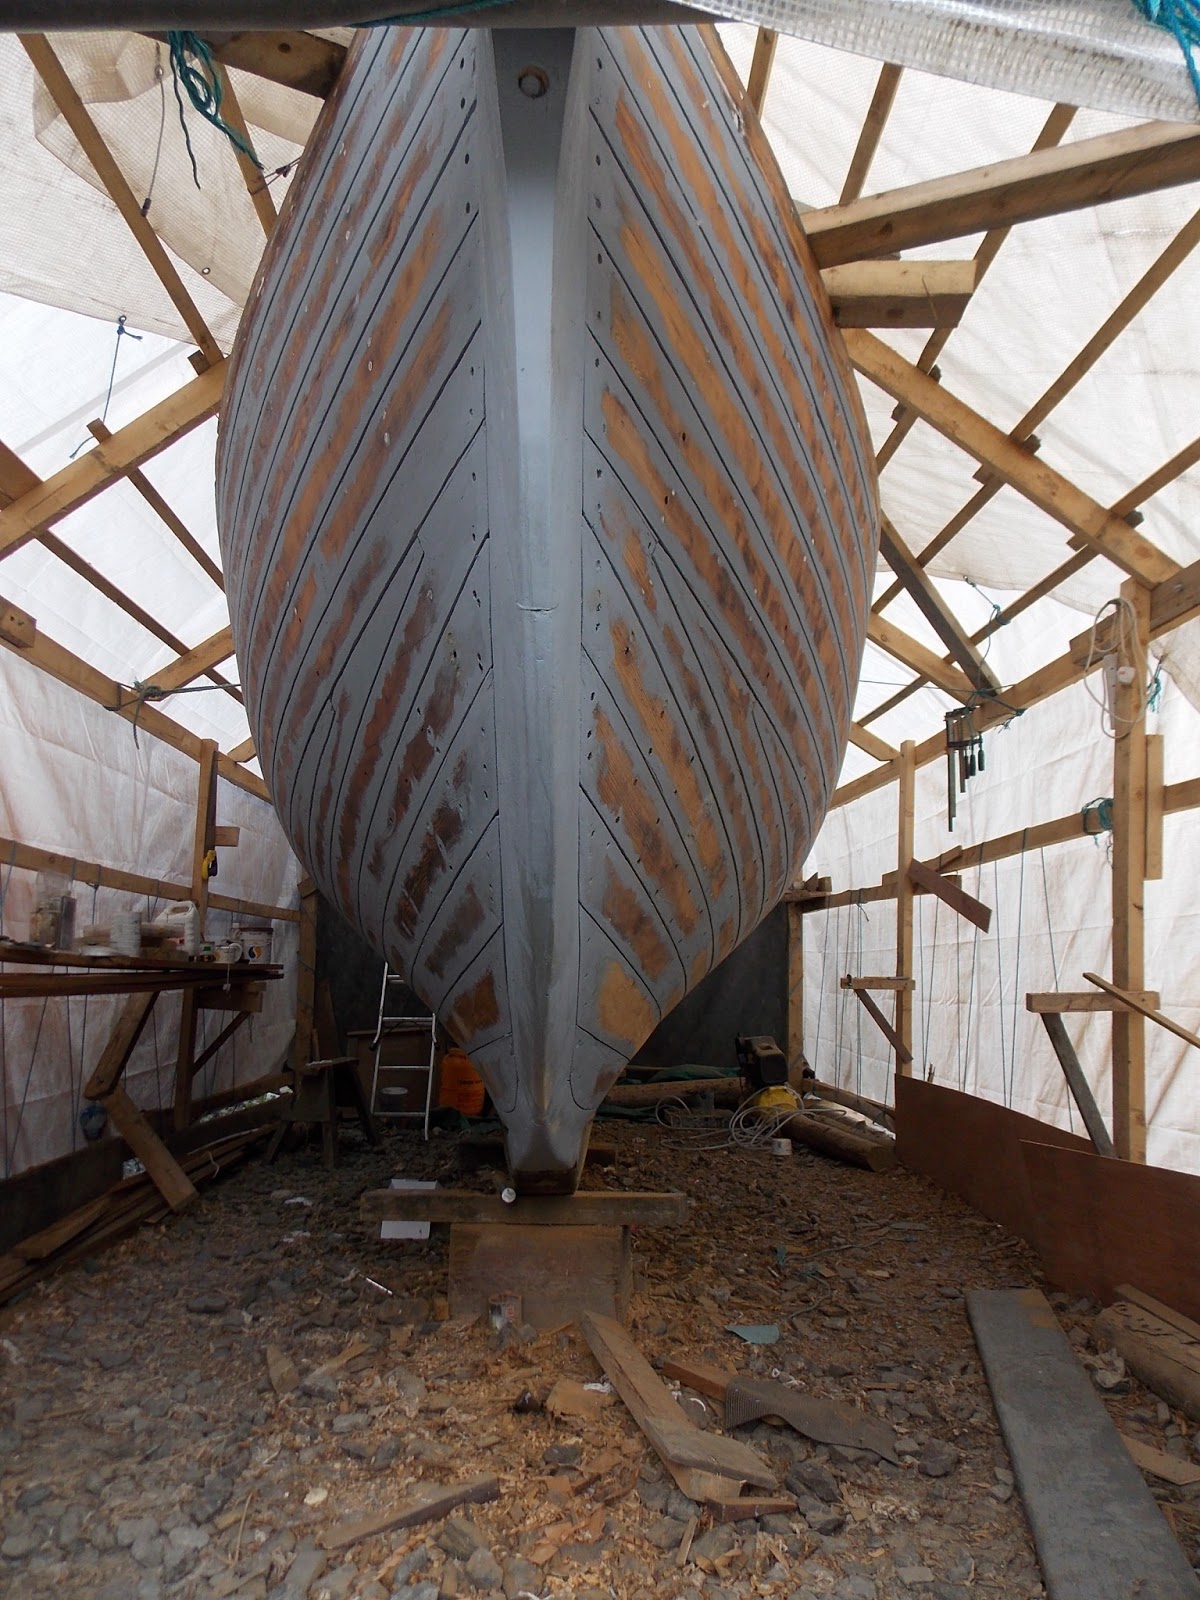
Some late evening planing shows the pressure is on


Saturday 1 June 2013

Red lead

Well I've caulked everything except where I'm missing the ribs on the starboard rear quarter
and around the transom so until I get ribs I've started putting in red lead putty.
White lead putty is usually used above the water line so red doesn't bleed through the paint
but I'm just going to use what I've got and hope it doesn't.


I really can't depict the curvature of the hull in a photo. Sitting where I took the picture it looks so much nicer in the flesh